Whether we’re working on a single home project, a retirement village with 100 villas, or a Marae – the journey of a project is very similar.
At any given time, the Arcline Team can have upwards of a hundred projects, all at various stages, of the design and build process.
No, this does not mean we’re working on every one of these, every day!
Some might be in the initial discussions about the client’s brief, others we could be waiting on engineering drawings, and others might be half built.
Let’s explain with pictures:
Initial Chats & Site Visits
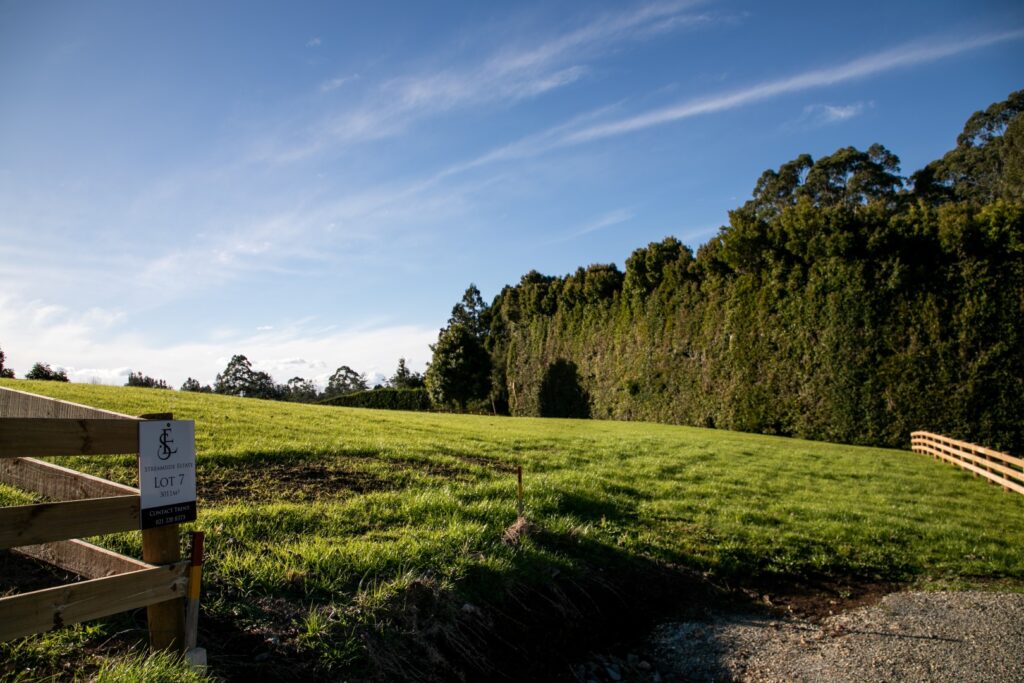
When new clients contact us, we do an initial desktop study of their property, the location, zoning, rules, and draw on our network of geniuses for any specific information we think could be helpful.
We then meet onsite and consider the physical aspects – sun, wind, views, access, power, water, sewer, slope….and so on.
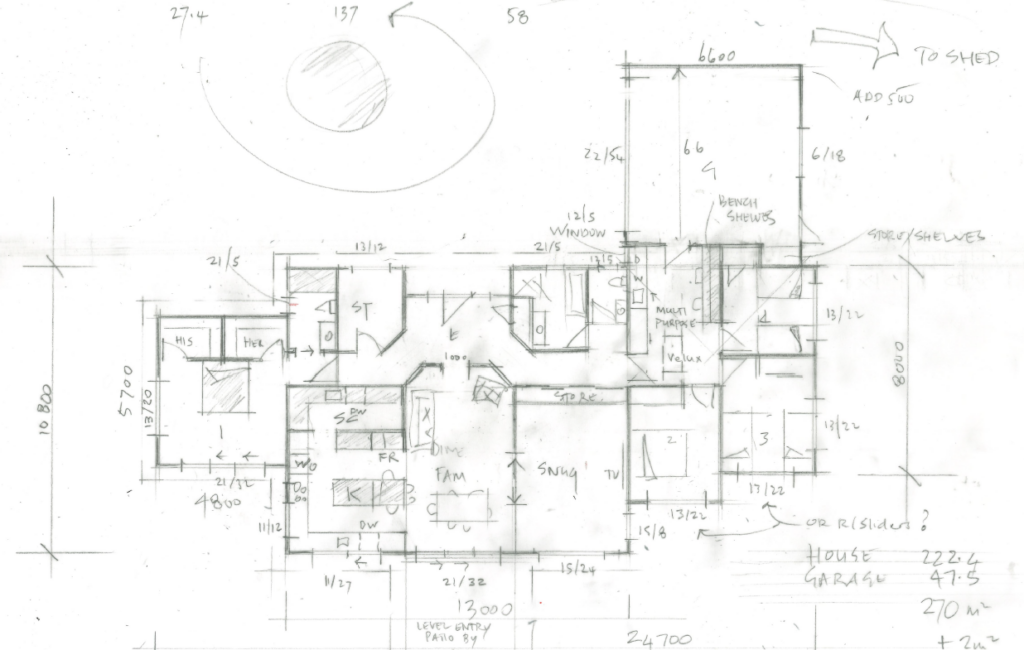
Pencil Sketching Ideas
Back at the studio we start sketching site and floor plan layout ideas to meet your brief, budget and site. Our preference is to begin ideas with a pencil in hand, letting our mind work without the constraints or frustrations of technology!
Free Ebook Download:
'52 Tips For Designing & Building Your Home'
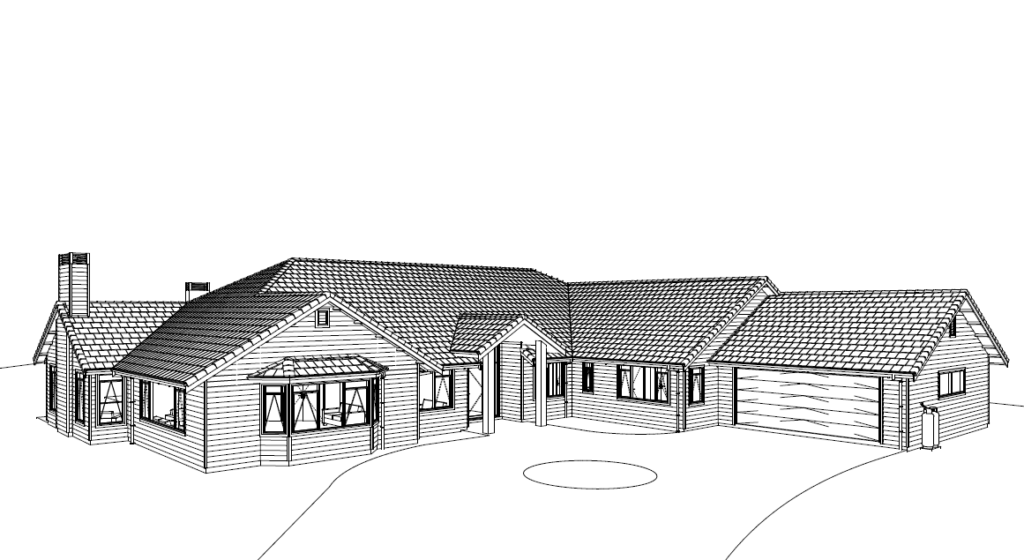
CAD Concepts
Once we’re all happy with the direction the design is going with the pencil concepts, we model up your project in full 3D using our drafting software.
This allows you to do a virtual walkthrough of your project and helps us get room, window and door sizes exact.
Resource Consent (if needed)
The location and district council zoning of your property will dictate whether a resource consent is needed for your project. When designing we do our best to prevent this but it’s often unavoidable.
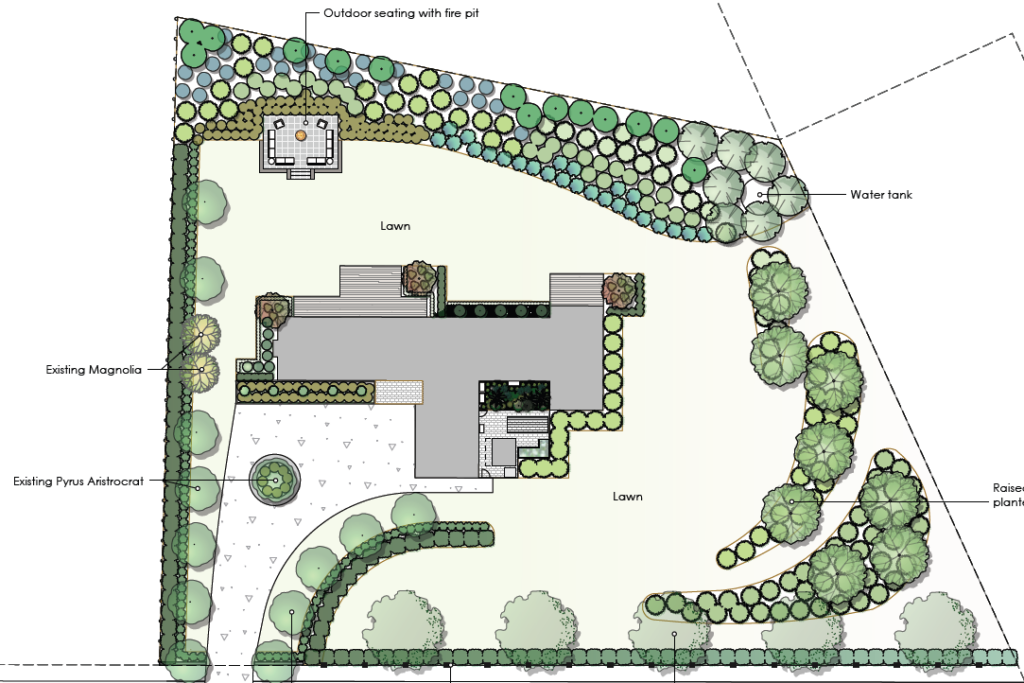
A lot of the time if your property is coastal a landscaping plan will be required (like the below image).
Developed Design & Subconsultants
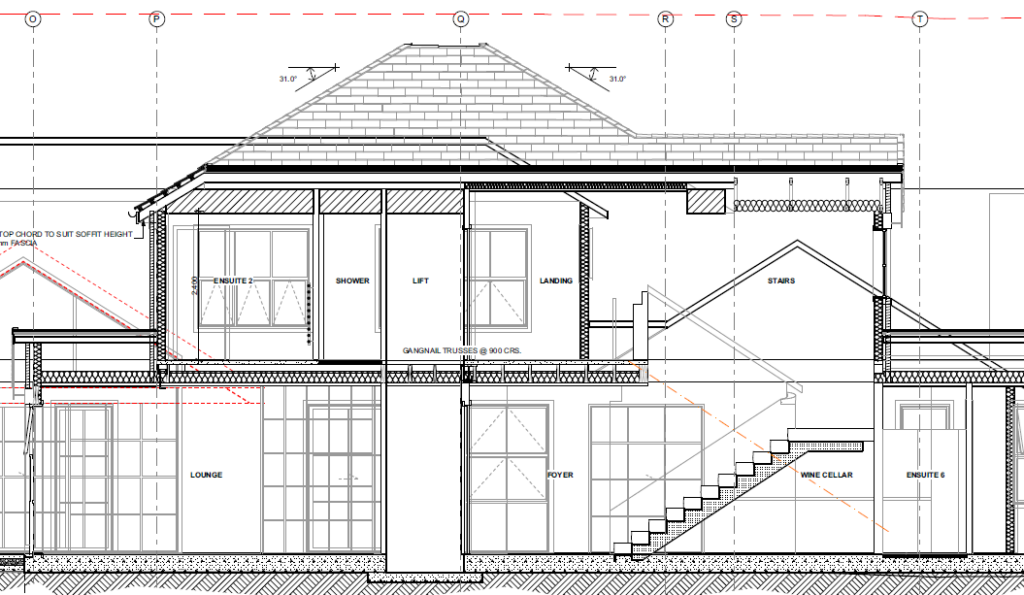
We then add more details to your plans (like cross sections – see below) which then are sent to other consultants for their input – structural engineers, fire engineers, truss designers, kitchen designers, wastewater engineers, to name a few.
Detailed Design & Specifications
As the information from other consultants is trickling in, we continue to work on the detailed plans where we model the structural elements and draw the required details, like cladding corners, roof junctions, and window details.
Simultaneously, we complete a written document called the ‘specifications’ which cover every aspect of the project and is formatted in groups – Electrician, Plumber, Carpenter etc.

Building Consent
Time to submit it! Our skilled project support team then compile all of the required plans, documents and forms and submit a Building Consent to your local Council.
More often than not, Council have RFIs (Requests For Information) where they will ask questions about the project and we’ll answer them, and once satisfied they’ll issue a Building Consent for your project.

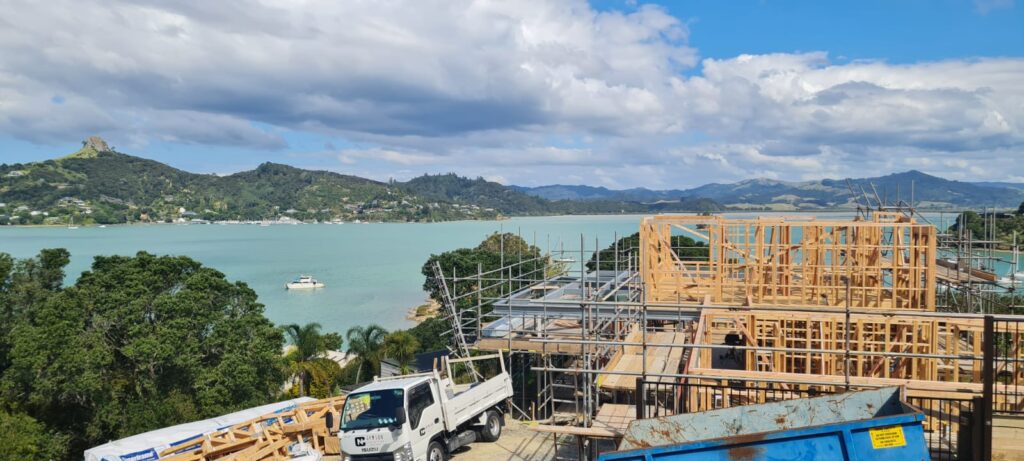
Construction Begins
As soon as you have an issued building consent, your builder can get underway.
As the build process is a little too long to include on this email we’ve summarised the following steps which most projects follow, which can be only a few months through to several years long, depending on your project size.
1. Earthworks
2. Foundations
3. Wall Framing
4. Roof Framing
5. Roofing
6. Cladding
7. Window and Doors Install
8. Prewire and Prepipe
9. Insulation
10. Lining (Gibbing)
11. Trims – Architraves, Skirtings, Scotia’s
12. Gibstopping
13. Painting
14. Flooring – Tiles, Timber, Carpet
15. Cabinetry – Kitchen, Laundry, Bathrooms
16. Final Fitoff – Electrical & Plumbing
17. Final Inspection
18. Code of Compliance Certificate (CCC)